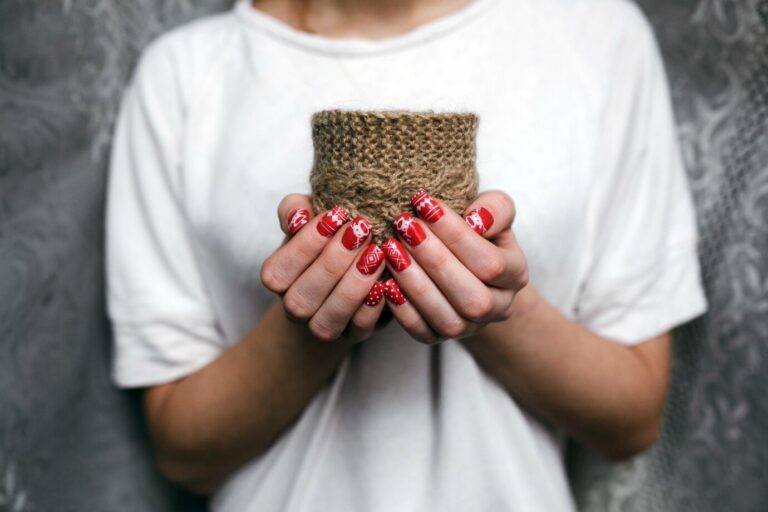
Thanksgiving isn’t just about gathering around the dinner table—it’s also the perfect time to showcase your style with seasonally inspired nail art! Whether you’re hosting a Thanksgiving feast or meeting up with loved ones, themed nail designs are a fun way to get into the holiday spirit.
This post is packed with Thanksgiving nail art ideas, step-by-step tutorials, and tips to help your festive manicure last through second helpings and laughter-filled days.
Thanksgiving Nail Art Ideas
The beauty of Thanksgiving nails lies in their versatility. Whether you love vibrant, festive patterns or understated designs, there’s something for everyone.
Classic Colors
Channel Thanksgiving’s rich autumnal vibes with designs featuring warm, seasonal tones.
- Rustic ombré: Blend colors like burnt orange, mustard yellow, and deep burgundy for a gradient effect reminiscent of falling leaves.
- Gold accents: Pair a matte brown polish with gold foil or stripes for a sophisticated yet festive look.
- Harvest florals: Use orange and cream shades to hand-paint delicate floral accents on a neutral base.
These color schemes are not only perfect for Thanksgiving but offer a timeless elegance that works all season long.
Festive Patterns
Get playful with your Thanksgiving manicure! Incorporate patterns that celebrate the holiday’s spirit.
- Pumpkins: Tiny orange pumpkins on a creamy beige base are adorable and chic. Use a fine nail art brush or a dotting tool to bring this design to life.
- Leaves and vines: Create intricate designs with warm green and gold on top of a nude base. You can use nail art stickers if hand-painting feels intimidating.
- Turkeys: Add a little humor to your nails by painting a cute cartoon turkey! This design is bound to be a conversation starter.
Festive patterns are great for bringing creativity and personality to your manicure.
Glitter and Glam
If you’d rather make a bold statement, Thanksgiving nails can also shine—literally!
- Glitter fade: Apply glitter polish that starts heavy at the tip of your nail and gradually fades down for a sparkling, elegant look.
- Metallic accents: Combine a soft cranberry polish with gold or copper metallic stripes.
- Rhinestone embellishments: Add subtle rhinestones or studs at the base of your nails for an effortlessly glamorous vibe.
These designs will ensure your manicure stands out during holiday gatherings.
Minimalist Designs
For those who prefer an understated look, minimalist Thanksgiving nails are the way to go.
- Neutral tones: Use soft taupe, beige, or ivory shades for a clean look, adding tiny gold or white dots for a festive touch.
- Negative space: Play with negative space by painting simple dots or lines and leaving parts of the nail bare for a stunning geometric design.
- Mini motifs: Add a tiny leaf or mini turkey on a single accent nail for a subtle holiday nod.
Minimalist designs offer sophistication without being overly elaborate, perfect for everyday wear.
Step-by-Step Tutorials
Get creative at home with these beginner-friendly Thanksgiving nail art tutorials.
Easy Fall Leaf Design
What you’ll need:
- Base coat
- Nude polish
- Accent colors (orange, gold, and green)
- Thin nail art brush
Steps:
- Apply a base coat to your nails and allow it to dry.
- Paint your nails nude for the background.
- Use a nail art brush and orange polish to draw small leaf shapes.
- Add smaller details like veins using green and gold polish.
- Seal your design with a glossy top coat.
Glitter Ombre Nails
What you’ll need:
- Base coat
- Gold glitter polish
- Burgundy or deep red polish
- Makeup sponge
Steps:
- Apply a base coat. Once dry, paint your nails with your chosen base color.
- Dab gold glitter polish onto a makeup sponge and gently press it onto the tip of your nails to create an ombre effect.
- Keep layering until you achieve the desired intensity.
- Top it off with a glossy or gel top coat to secure the glitter.
Whether you’re a nail art expert or trying your hand for the first time, these tutorials will give you stunning results.
Tips for Long-Lasting Thanksgiving Nails
To ensure your gorgeous Thanksgiving manicure lasts for days, follow these pro tips:
- Start with clean nails: Wash your hands and lightly buff the surface of your nails before polishing. This helps the polish adhere better.
- Use a base and top coat: A quality base coat prevents staining and smooths the nail surface. A top coat locks in your design and adds shine.
- Seal the edges: Swipe your polish along the tip of your nail to prevent chipping.
- Avoid harsh chemicals: Wear gloves while doing chores like washing dishes to protect your manicure.
With the right prep and care, your Thanksgiving nail art can survive through Black Friday sales and beyond!
Join the Thanksgiving Nail Art Fun
There’s no better way to celebrate the season than with a creative, festive manicure. From classic fall colors to playful patterns and sparkling glam, Thanksgiving nails are a fun expression of the holiday spirit.
We’d love to see your designs! Share your Thanksgiving nail art on Instagram and tag us at [@YourHandle]. Who knows? Your design might inspire our next holiday feature!
Happy Thanksgiving (and happy painting)!
